
There’s a specific kind of frustration that comes from reading Apple documentation on WidgetKit when you want interactive widgets. You search for the right provider type. You find AppIntentTimelineProvider. You read the name. It has “AppIntent” in it. You assume it’s the one you want.
It’s not.
That mistake costs an afternoon minimum. Let’s not do that.
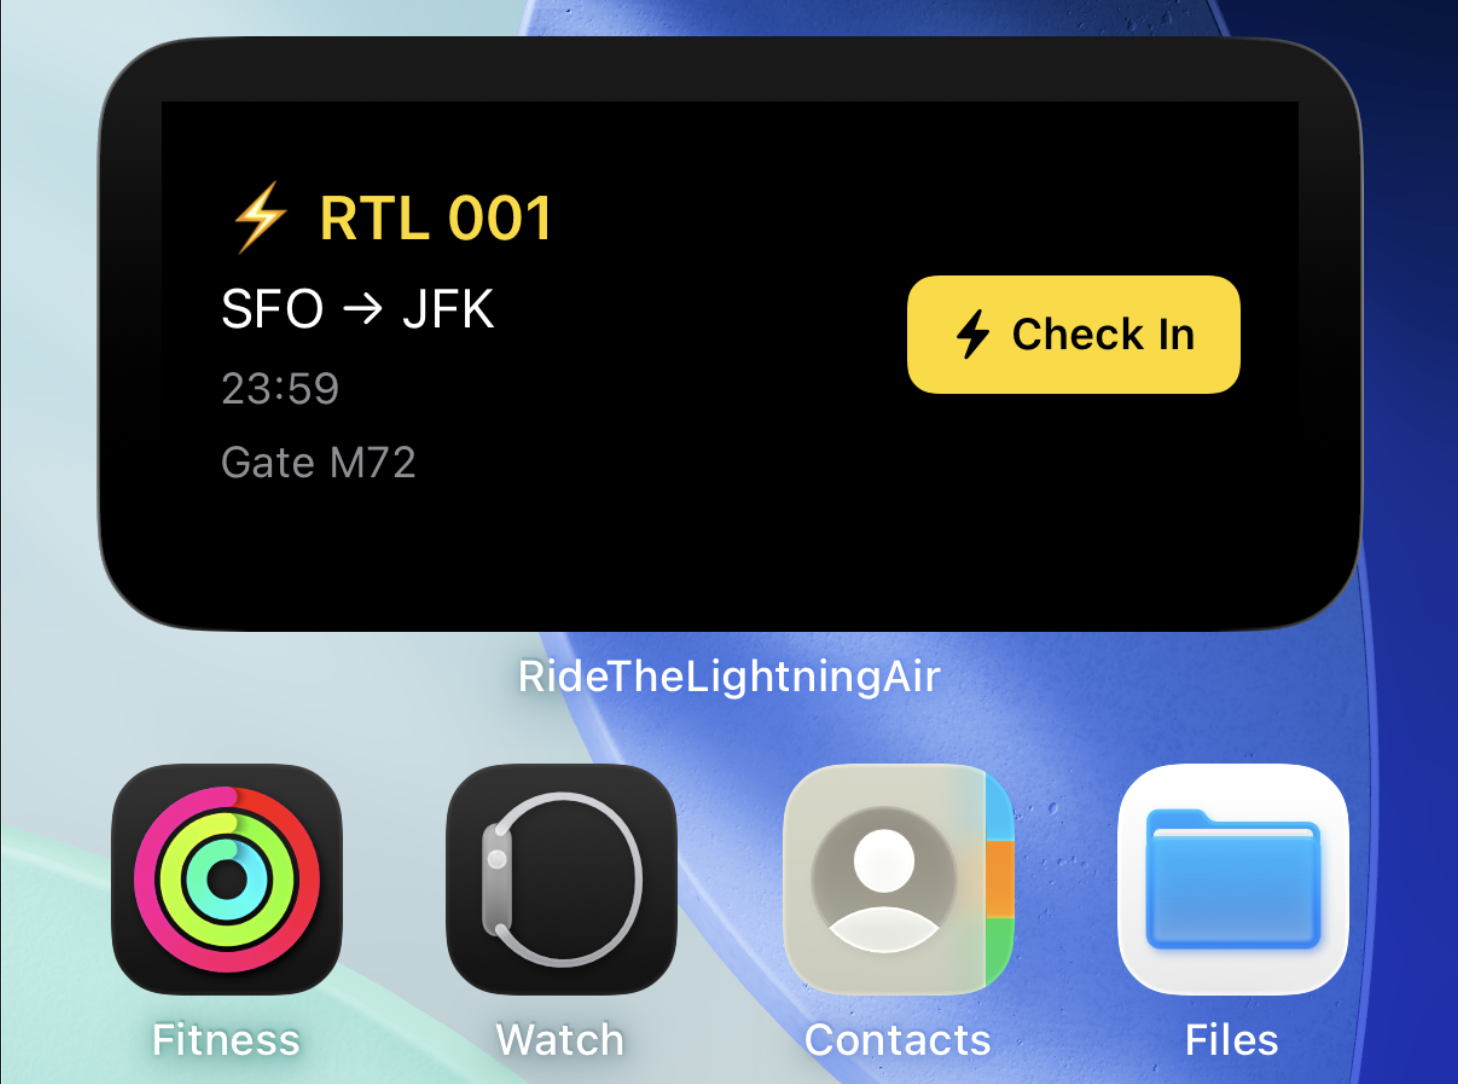
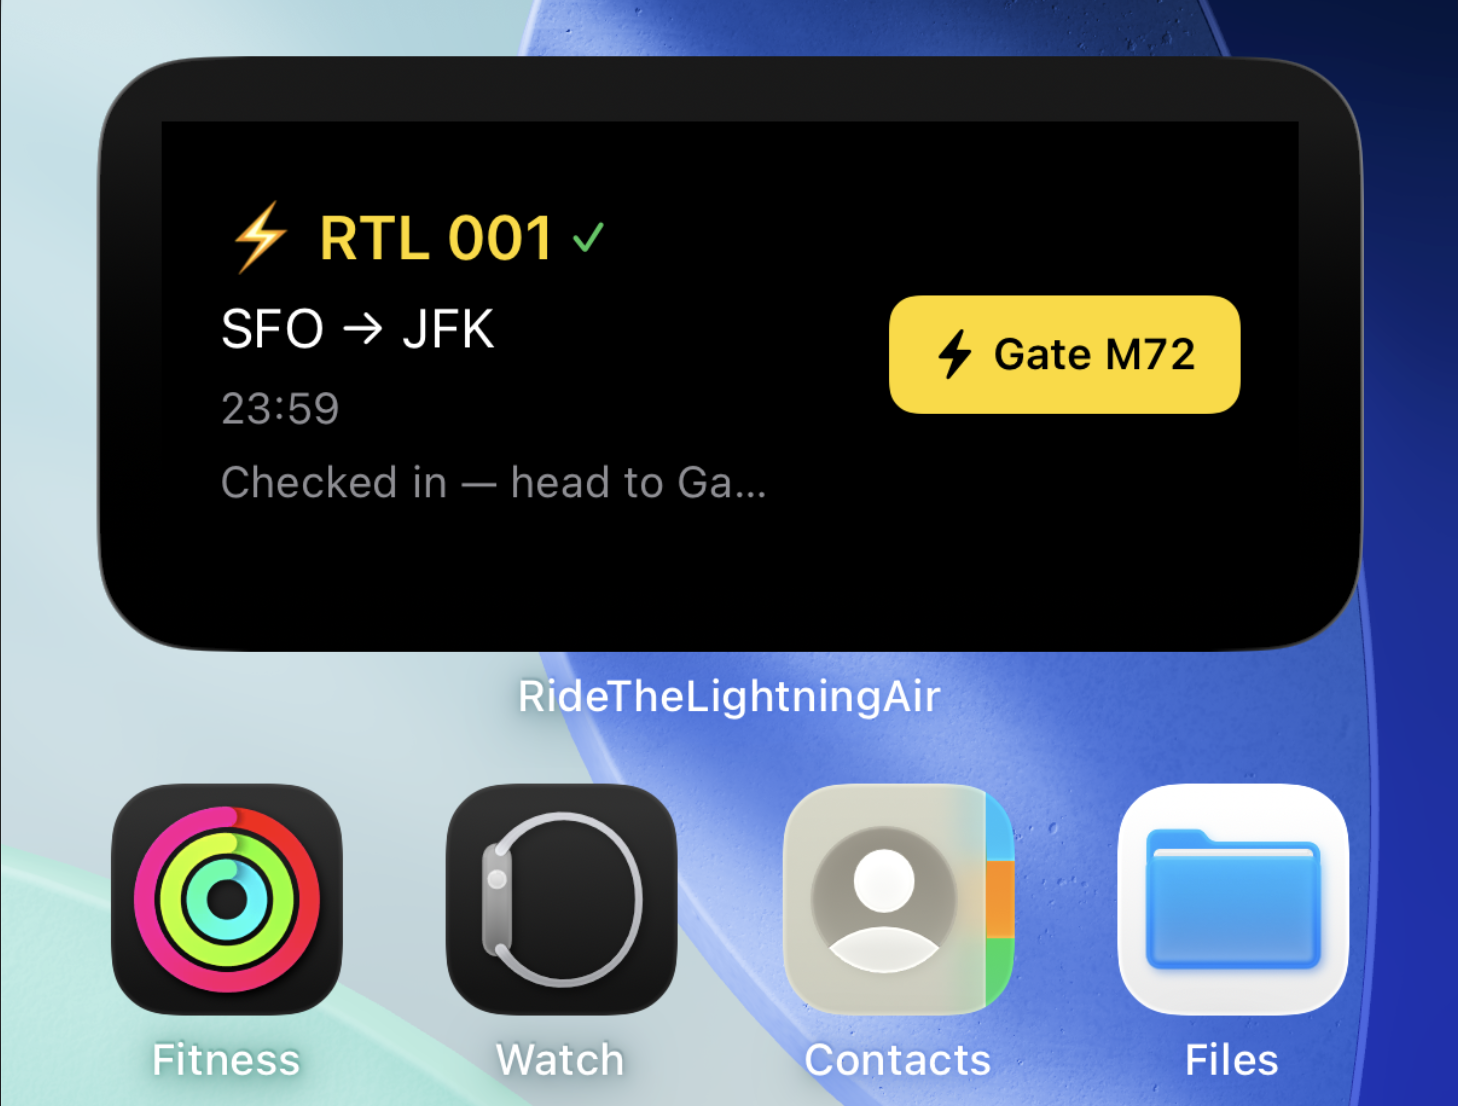
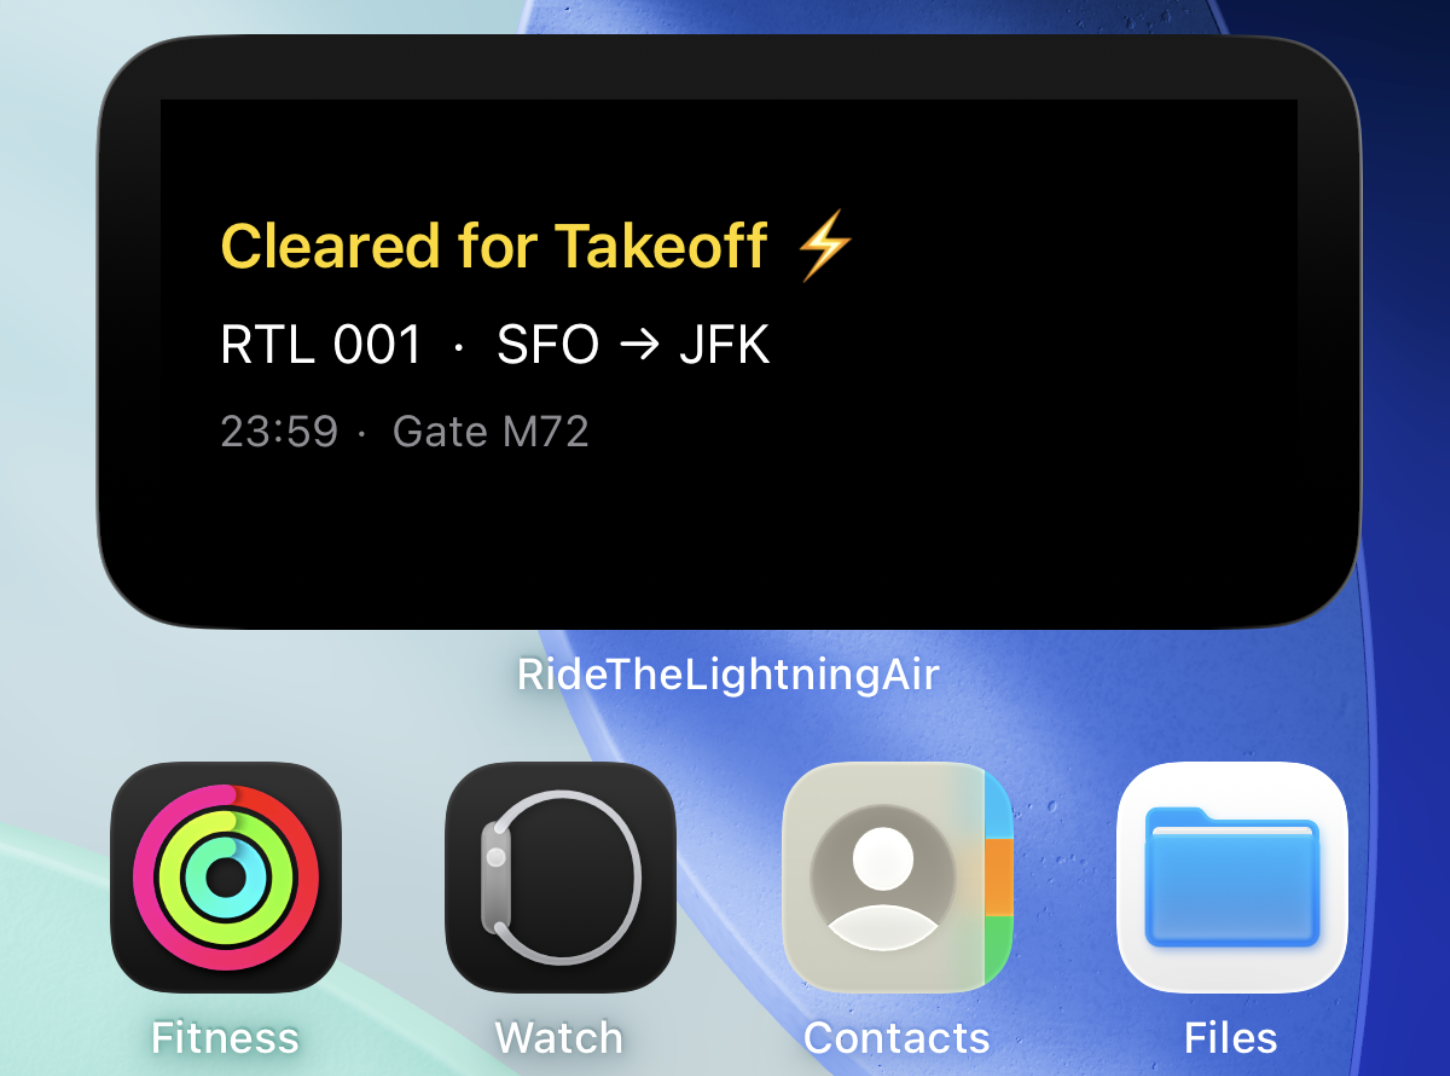
The demo app for this post is Ride the Lightning Air — a fictional airline where every flight departs at 11:59 PM from Gate M72. Flight RTL 001, SFO to JFK. The widget tracks a passenger through three states: not checked in, checked in, and gate confirmed. Two interactive buttons drive those transitions. The terminal state has no button — just the flight info and a lightning bolt.
Three states. Two intents. One TimelineProvider. That’s the whole thing.
The source is on GitHub: wesmatlock/RideTheLightningAir. Clone it and follow along, or just read.

The Misconception Worth Killing First
AppIntentTimelineProvider is for user-configurable widgets — the kind where someone long-presses the widget, taps “Edit Widget,” and picks settings like which city to show weather for, or which stock to track. It’s a protocol that injects the user’s chosen configuration into your getTimeline call.
It has nothing to do with interactive buttons.
Interactive buttons work with plain TimelineProvider. If your widget has tappable actions and zero user-configurable settings, you want TimelineProvider. Full stop. The name AppIntentTimelineProvider is genuinely misleading here, and the docs don’t exactly rush to clarify it.
Now let’s build something.
The Foundation: Shared Models and a Data Bridge
The app and the widget extension are separate processes. They don’t share memory. A UserDefaults write from the app is invisible to the widget unless both are pointing at the same shared container.
That shared container is an AppGroup. You configure one in your target’s entitlements — both the main app target and the widget extension target need the same group identifier. In this case, group.net.insoc.rtlair.
The FlightStatus enum needs to round-trip through UserDefaults, so it’s Codable:
import Foundation

struct Flight {
    let flightNumber: String
    let origin: String
    let destination: String
    let departureTime: Date
    let gate: String

    static let mock: Flight = {
        var components = DateComponents()
        components.hour = 23
        components.minute = 59
        return Flight(
            flightNumber: "RTL 001",
            origin: "SFO",
            destination: "JFK",
            departureTime: Calendar.current.date(from: components) ?? Date(),
            gate: "M72"
        )
    }()
}

enum FlightStatus: String, Codable {
    case notCheckedIn
    case checkedIn
    case gateConfirmed

    var displayLabel: String {
        switch self {
        case .notCheckedIn:  return "Not Checked In"
        case .checkedIn:     return "Checked In ✓"
        case .gateConfirmed: return "Cleared ⚡️"
        }
    }
}
FlightStore wraps the shared suite. It’s a singleton that both the app and the widget extension import from a shared Swift package or framework target. When status is set, it immediately calls WidgetCenter.shared.reloadAllTimelines() — that’s the entire refresh trigger.
import Foundation
import WidgetKit

final class FlightStore {
    static let shared = FlightStore()
    private init() {}

    private let defaults = UserDefaults(suiteName: "group.net.insoc.rtlair")!
    private let statusKey = "flightStatus"

    var status: FlightStatus {
        get {
            let raw = defaults.string(forKey: statusKey) ?? FlightStatus.notCheckedIn.rawValue
            return FlightStatus(rawValue: raw) ?? .notCheckedIn
        }
        set {
            defaults.set(newValue.rawValue, forKey: statusKey)
            WidgetCenter.shared.reloadAllTimelines()
        }
    }
}
The UserDefaults(suiteName:) initializer is what makes this work. Without the suite name, UserDefaults.standard is process-local. With it, both processes read and write to the same file on disk.
Set 1: The Timeline Provider
FlightEntry is the data container that flows from provider to view:
import WidgetKit

struct FlightEntry: TimelineEntry {
    let date: Date
    let flight: Flight
    let status: FlightStatus
}
The provider is deliberately minimal. getTimeline reads the current status from FlightStore, wraps it in one entry, and returns it with policy: .never.
import WidgetKit

struct Provider: TimelineProvider {
    func placeholder(in context: Context) -> FlightEntry {
        FlightEntry(date: Date(), flight: .mock, status: .notCheckedIn)
    }

    func getSnapshot(in context: Context, completion: @escaping (FlightEntry) -> Void) {
        completion(FlightEntry(date: Date(), flight: .mock, status: FlightStore.shared.status))
    }

    func getTimeline(in context: Context, completion: @escaping (Timeline<FlightEntry>) -> Void) {
        let entry = FlightEntry(date: Date(), flight: .mock, status: FlightStore.shared.status)
        // .never — all timeline refreshes are intent-driven, not scheduled
        completion(Timeline(entries: [entry], policy: .never))
    }
}
policy: .never is the right call when your widget’s state changes are entirely event-driven. You’re not polling. You’re not scheduling refreshes at intervals. The intent fires, updates FlightStore, and the reloadAllTimelines() call in the setter causes the system to call getTimeline again immediately. That’s the full cycle.
If you passed policy: .atEnd or .after(_:), you’d just be scheduling unnecessary work.
Set 2: The Interactive Buttons
The intents are simple. Each one updates FlightStore and returns a result. The system calls perform() in the background when the button is tapped.
import AppIntents
import WidgetKit

struct CheckInIntent: AppIntent {
    static var title: LocalizedStringResource = "Check In"

    func perform() async throws -> some IntentResult {
        FlightStore.shared.status = .checkedIn
        return .result()
    }
}
import AppIntents
import WidgetKit

struct ConfirmGateIntent: AppIntent {
    static var title: LocalizedStringResource = "Confirm Gate"

    func perform() async throws -> some IntentResult {
        FlightStore.shared.status = .gateConfirmed
        return .result()
    }
}
The button syntax is the only unfamiliar piece if you’re coming from standard SwiftUI. Instead of a closure, you pass an intent instance:
Button(intent: CheckInIntent()) {
    HStack(spacing: 4) {
        Image(systemName: "bolt.fill")
        Text("Check In")
    }
    .font(.caption).bold()
    .foregroundStyle(.black)
    .padding(.horizontal, 12)
    .padding(.vertical, 8)
    .background(yellow)
    .clipShape(RoundedRectangle(cornerRadius: 8))
}
.buttonStyle(.plain)
Button(intent:) is available from iOS 17. The system serializes the intent, runs it in a background process when tapped, and then triggers a widget reload. You don’t manage any of that. You just provide the intent instance.
The view logic that decides which button to show is a simple switch on entry.status:
switch entry.status {
case .notCheckedIn:
    // Show Check In button
case .checkedIn:
    // Show Gate M72 button
case .gateConfirmed:
    // No button — terminal state
}
Set 3: The Terminal State and containerBackground
When status is .gateConfirmed, the widget shows the flight info and nothing else. No button. The passenger is cleared for takeoff. The system has done its job.
This is also where containerBackground comes in — and it’s not optional. On iOS 17+, if you don’t use containerBackground, the widget crashes. It replaces the old .background modifier approach entirely.
For the medium widget on the home screen, you pass a color:
StaticConfiguration(kind: kind, provider: Provider()) { entry in
    MediumWidgetView(entry: entry)
        .containerBackground(.black, for: .widget)
}
For the lock screen widget, you pass an empty closure. Lock screen widgets use system-defined backgrounds — you’re not controlling the color:
StaticConfiguration(kind: kind, provider: Provider()) { entry in
    LockScreenWidgetView(entry: entry)
        .containerBackground(for: .widget) { }
}
Both use StaticConfiguration with the plain Provider. Not AppIntentConfiguration. Not AppIntentTimelineProvider. Still just StaticConfiguration.
Wiring It Together
The full widget bundle registers both surfaces:
import WidgetKit
import SwiftUI

@main
struct RideTheLightningAirWidgetBundle: WidgetBundle {
    var body: some Widget {
        MediumWidget()
        LockScreenWidget()
    }
}

struct MediumWidget: Widget {
    let kind = "MediumWidget"

    var body: some WidgetConfiguration {
        StaticConfiguration(kind: kind, provider: Provider()) { entry in
            MediumWidgetView(entry: entry)
                .containerBackground(.black, for: .widget)
        }
        .configurationDisplayName("RTL Flight Status")
        .description("Track your Ride the Lightning Air flight.")
        .supportedFamilies([.systemMedium])
    }
}

struct LockScreenWidget: Widget {
    let kind = "LockScreenWidget"

    var body: some WidgetConfiguration {
        StaticConfiguration(kind: kind, provider: Provider()) { entry in
            LockScreenWidgetView(entry: entry)
                .containerBackground(for: .widget) { }
        }
        .configurationDisplayName("RTL Flight")
        .description("Quick flight status at a glance.")
        .supportedFamilies([.accessoryRectangular])
    }
}
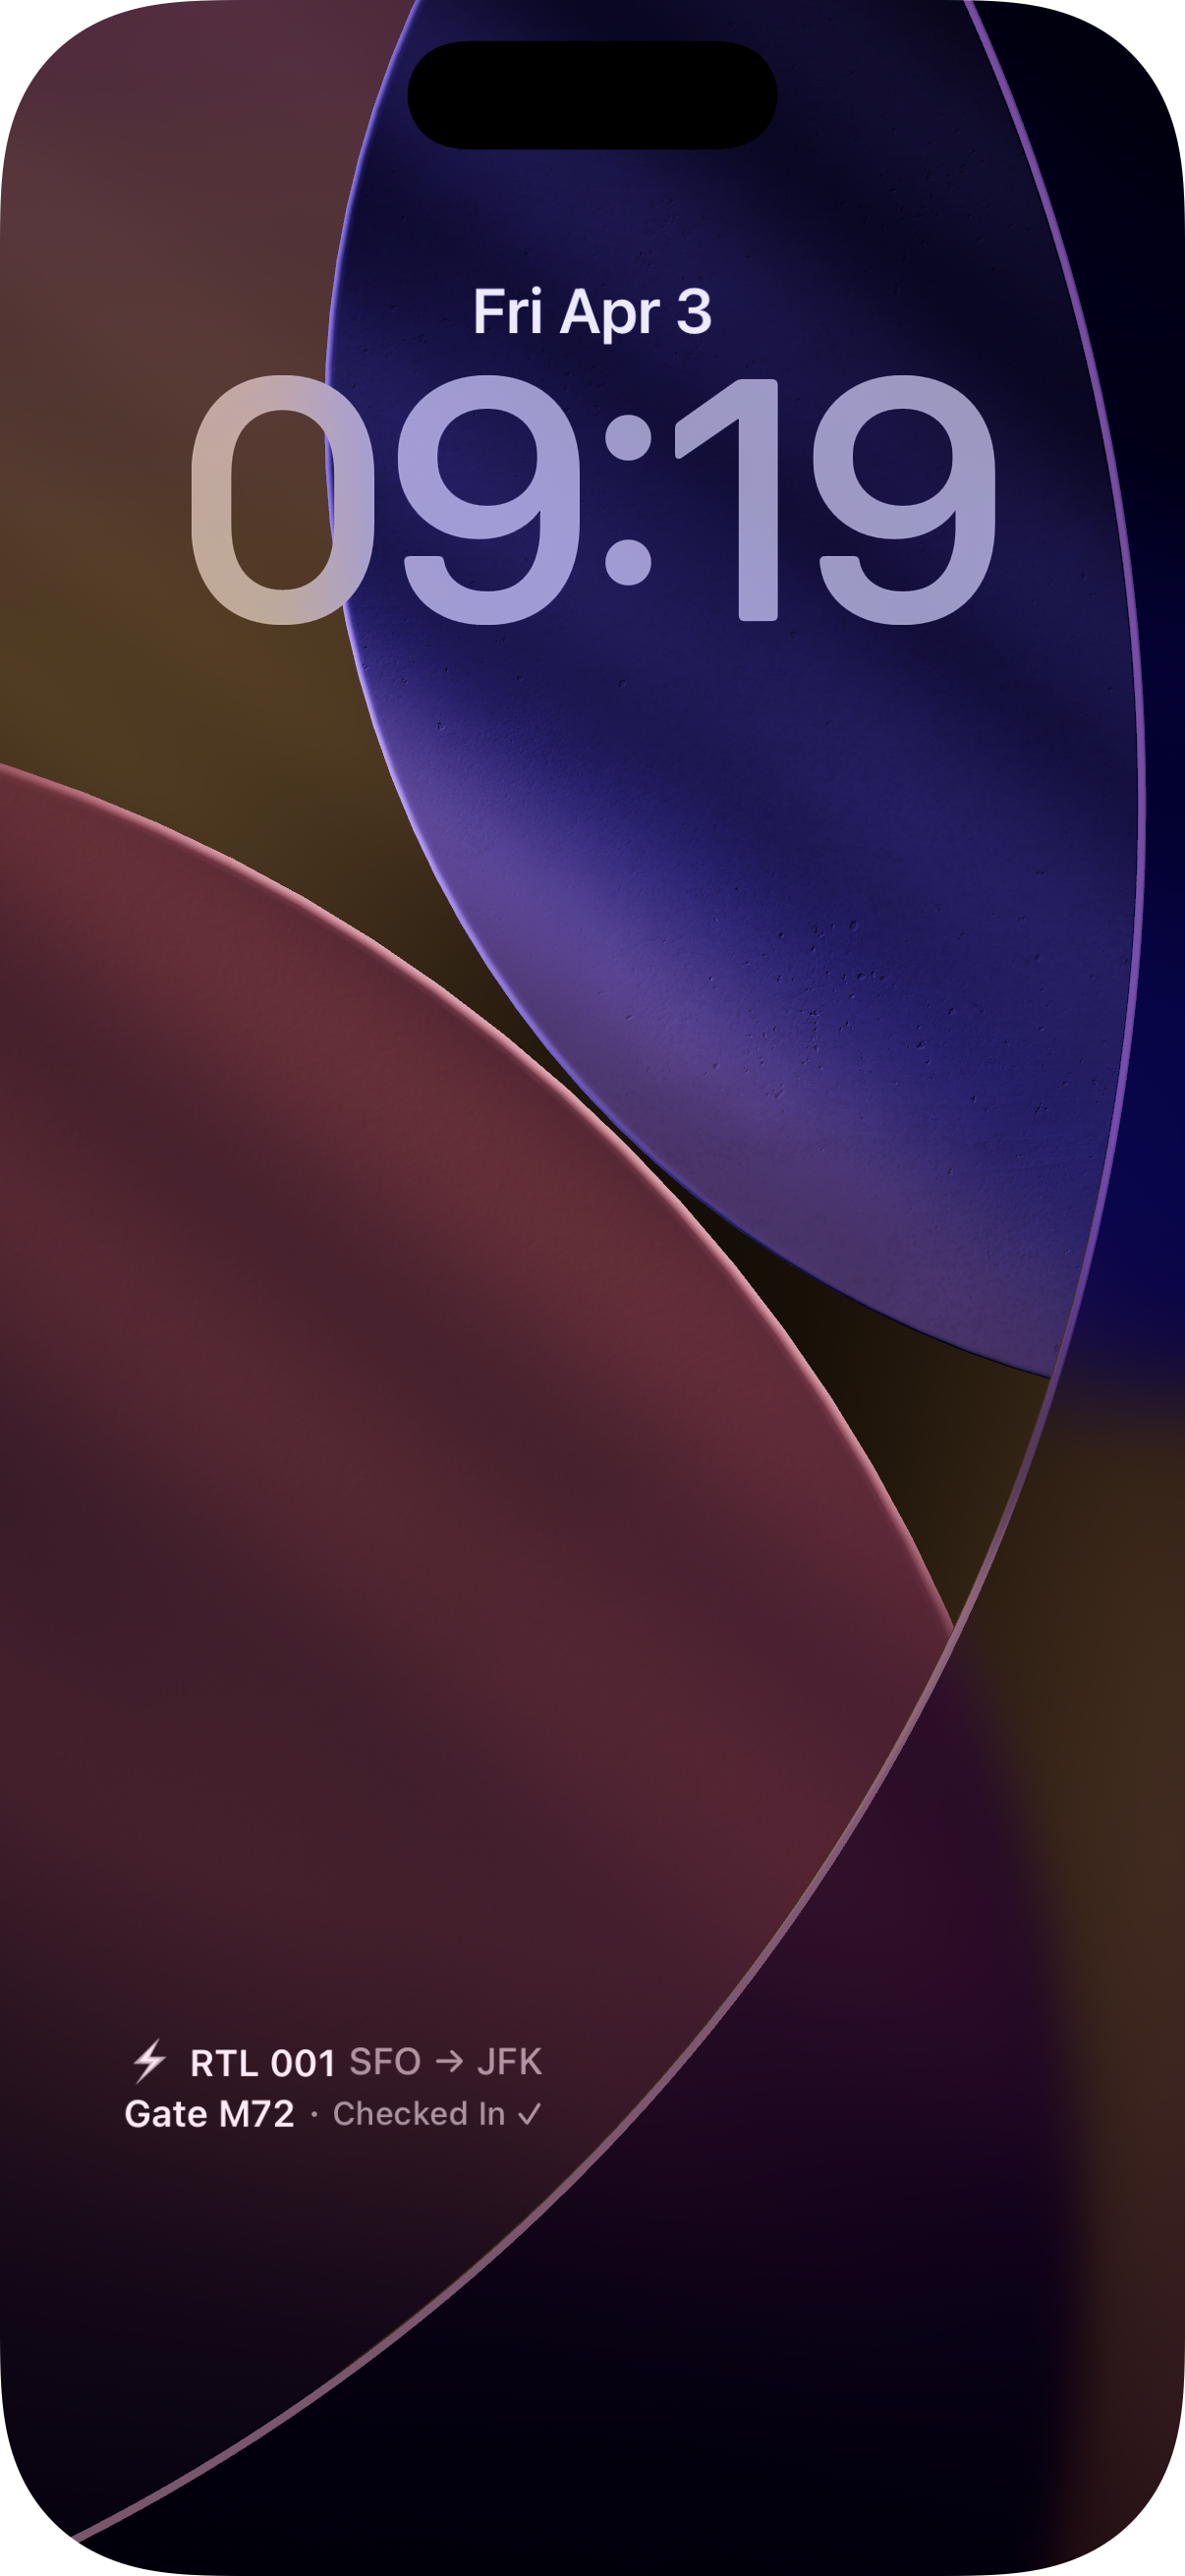
The lock screen view is compact by design — it has to fit in .accessoryRectangular, so it’s one line with a minimum scale factor:
import SwiftUI
import WidgetKit

struct LockScreenWidgetView: View {
    let entry: FlightEntry

    var body: some View {
        HStack(spacing: 3) {
            Text("⚡️")
            Text(entry.flight.flightNumber)
                .bold()
            Text("·").foregroundStyle(.secondary)
            Text("\(entry.flight.origin)→\(entry.flight.destination)")
            Text("·").foregroundStyle(.secondary)
            Text("Gate \(entry.flight.gate)")
            Text("·").foregroundStyle(.secondary)
            Text(entry.status.displayLabel)
                .foregroundStyle(.secondary)
        }
        .font(.caption2)
        .minimumScaleFactor(0.6)
        .lineLimit(1)
    }
}
Note that interactive buttons aren’t available in lock screen widget families — Button(intent:) is only supported in home screen and StandBy widget sizes. The lock screen view is read-only. That’s a system constraint, not a design decision.
The Refresh Cycle, Summarized
It’s worth making this explicit because it’s easy to get confused about what triggers what.
- User taps a
Button(intent:)in the widget - The system runs
CheckInIntent.perform()(orConfirmGateIntent.perform()) in the background perform()setsFlightStore.shared.status- The
statussetter writes to the sharedUserDefaultssuite and callsWidgetCenter.shared.reloadAllTimelines() - The system calls
Provider.getTimeline(in:completion:) getTimelinereads the updated status fromFlightStoreand returns a newTimelinewithpolicy: .never- The widget re-renders with the new entry
That’s the complete loop. No polling. No scheduled refreshes. Every state change is intentional and user-initiated.
A Few Things Worth Knowing Before You Ship
AppGroup configuration is easy to get wrong. Both targets — the main app and the widget extension — need the AppGroup entitlement with the exact same identifier. If one is missing it, reads from the widget will silently fall back to the default (not-checked-in) state. Xcode won’t warn you. Check both targets in Signing & Capabilities.
Button(intent:) requires iOS 17. If you’re supporting iOS 16, the button will render but won’t be interactive. You’d need to gate the entire interactive widget feature on OS version. That’s a project-level decision, but worth knowing before you push to App Store Connect and get a surprise in review.
Intents run in a background extension process. You can do async work in perform(), but you’re not running in your main app process. Anything that requires app state beyond what’s in shared storage isn’t accessible. Design your intents to be self-contained.
Preview providers still use .notCheckedIn unless you explicitly set the status in your preview. If you’re iterating on the “gate confirmed” view and wondering why it’s not showing up in canvas, that’s why.
The most surprising thing about building interactive widgets is how little code is actually involved. The TimelineProvider is tiny. The intents are one-liners. The refresh cycle almost runs itself once FlightStore is wired to WidgetCenter.
The complexity is front-loaded into understanding which pieces do what — and specifically, that AppIntentTimelineProvider is not the interactive widget protocol. Once that’s clear, the rest follows naturally.
Gate M72. Boarding now.